|

|
You'll
need 5-7 squares for the doll IMPORTANT: the order of the layers:
hair than body, than all the next for cloths - prepare it carefully.
|
|

|
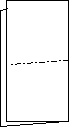
Fold all the squares
together In half - mountain fold (coloured side up)
|
|
|
Again fold in half -
mountain fold
|
|
|
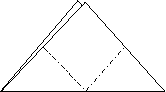
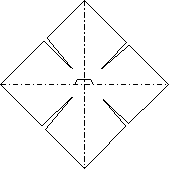
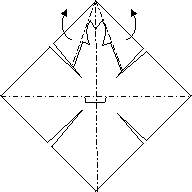
Unfold
and fold the diagonal
|
|
|
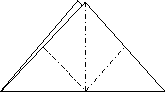
And again the other
diagonal
|
|
|
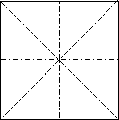
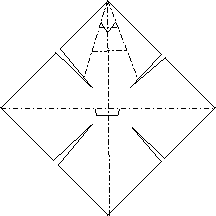
Unfold. You'll get this
pattern of creases (coloured side up view)
|
|
|
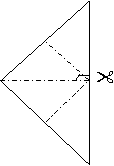
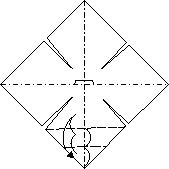
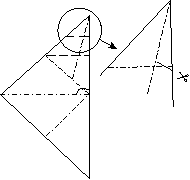
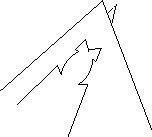
Take all the layers and
fold using existing crease than make a cut L-shaped as shown on the
diagram
|
|

|
Unfold and fold the other
diagonal
|
|
|
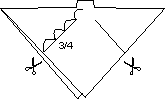
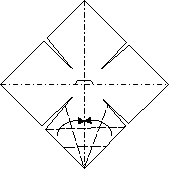
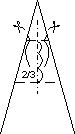
Make a cut basing on
existing crease, 3/4 deep, cut all the layers. The thickness of the
multiple layers might make it hard but try to make it very precise cut.
|
|
|
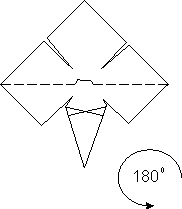
Unfold.
Now, to make head take two internal squares and separate it from the rest
|
|
|
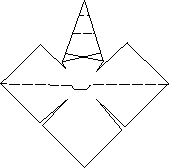
Take
both squares coloured side down and fold the bottom part in half and 1/4
|
|
|
Now,
fold the bottom part in "three"to (view the next diagram)
|
|
|
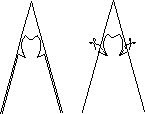
To
shape the face separate the "body" coloured square turn it up
side down.
|
|
|
Put
the paper coloured side up, (view on the bottom part from the previous
diagram) shape the head - to make the cuts symmetric fold on existing
crease.
|
|
|
Now fold the side pieces
of paper down. Do not cut them out!
|
|
|
The hair, take the second
of the squares (last separated),coloured side up fold in diagonal, in 1/4
of the part previously folded in three make a cut (it'll be forehead line
of hair.). Watch not to make the cut too deep.
|
|
|
Unfold the "hair"
square coloured side up.
|
|
|
Take
the square with the head (coloured side up and put the top part of the
head through the cut in the hair layer) just to reach the shape of the
head
See
the diagram below
|
|
|
Now
fold the side parts of the hair part back using the creases already there.
|
|
|
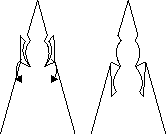
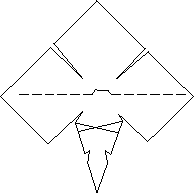
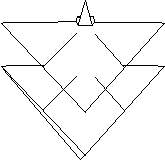
Make
cuts to shape the lower part of the face. Fold the small wings You'll get
down.
|
|
|
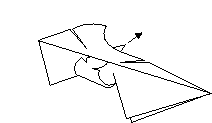
Turn
the model white side up
|
|
|
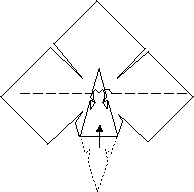
Now
the most difficult part:
Take
the part with the head and put it through the cou in the middle of the
square. You have to put through the whole head to the narrow part. The
problem is the size of the cut in the middle - it should be a bit smaller
than the head and making it wider would make the doll look not as good as
it should be. A little training and You'll find your own way to do it..
|
|
|
Good
luck with it !!!
|
|
|
This
is how the model should look after the battle. It has no full layer on the
back so...
|
|
|
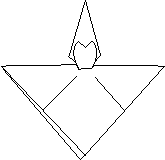
Put
another layer on
|
|
|
That's
what we get . This module is a beginning for all the dolls that will be
shown in this technique. Sitting dolls.
Good
LUCK
|
|

Diagrams and comments by M. Błaszak
2001
|